Raksha Bandhan is one of those celebrations where a small gesture carries a lot of meaning. A Rakhi may be a simple thread, bracelet or decorative band, but tying it can turn an ordinary family moment into a lasting memory. If you are doing it for the first time, there is no need to feel nervous. The basic ritual is easy to learn and you can keep it as traditional or as simple as your family prefers.
This guide explains how to tie a Rakhi, what to prepare before the ceremony, and how to complete the ritual comfortably. It also covers Rakhi types, tips for children and easy Rakhi celebration ideas. Whether you are a sibling, parent, grandparent or first-time participant, these Rakhi tying steps will help you feel ready.
What Is Raksha Bandhan?
Raksha Bandhan celebrates the affectionate bond between siblings. Traditionally, a sister ties a Rakhi around her brother’s wrist. While the brother gives a gift and expresses his affection and support. Today, families celebrate the festival in many personal ways. Sisters and brothers may exchange Rakhis and some people also include cousins or close family members.
Rakhi, the thread itself, represents connection and affection, it’s not just tradition but also that little feeling of closeness. The ceremony doesn’t have to be super complicated ,because you can still make it meaningful. What matters most is the time spent together, and the thought behind the gesture. There’s really no single perfect way to celebrate so try to focus on what feels comfortable, and genuine for your family, even if it’s different from what others do.
What Do You Need for a Rakhi Ceremony?
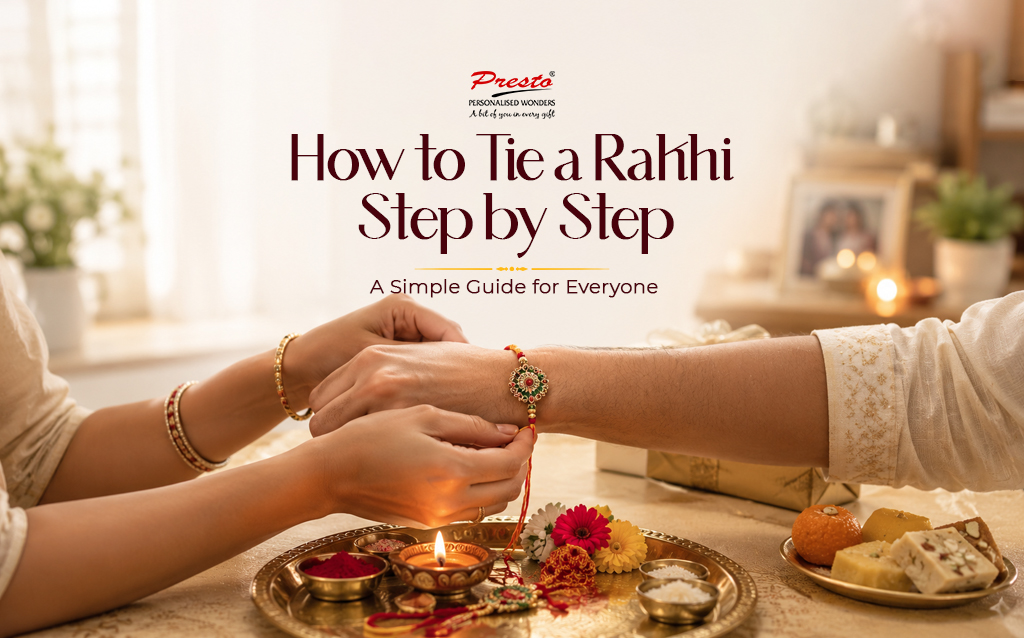
Before learning how to tie Rakhi step by step, gather the basic things first. Keep the setup simple. A bit of preparation helps everyone relax through the ritual calmly without confusion, or extra rushing.
-
A Rakhi that fits the wearer, comfortably.
-
A small plate ,or Rakhi thali.
-
Kumkum or tilak material.
-
A few grains of rice ,if your family uses them.
-
A diya ,if it’s part of your usual ceremony.
-
Sweets or a favourite dessert.
-
A gift for the sibling .
-
A clean napkin or tissue ,for convenience.
How to Tie a RakhiCorrectly: Step-by-Step?
The Rakhi ceremony steps below are easy to follow. Take your time, and adjust them so they match your family traditions. Because, honestly, the vibe matters more than being exact.
Step 1: Prepare the Rakhi
Start by choosing the Rakhi before everyone settles down. Make sure there are no loose beads, no sharp edges, or tangled strings.
If the Rakhi has long threads, separate them gently . This makes the tying process easier and also helps prevent knots from forming in the wrong place.
For a child ,choose a lightweight design with soft threads ,and a secure but comfortable closure. When you prep first, the actual ceremony becomes smoother, like no awkward stops. Keep the Rakhi within easy reach so you do not have to pause midway.
Step 2: Clean Your Hands and the Wrist
Wash and dry your hands before beginning. The person receiving the Rakhi should also have a clean, dry wrist.
This simple step helps keep the ceremony neat. It is especially useful when the Rakhi has decorative pieces that should remain clean.
If the brother is wearing a watch or several bracelets,move them aside temporarily. Leave enough room for the Rakhi to sit comfortably.
Step 3: Seat the Sibling Comfortably
Ask the brother or sibling to sit in a relaxed position. Place the wrist where you can easily reach it without stretching the thread.
Traditionally , a Rakhi is commonly tied on the right wrist of the brother. However, family customs can differ. If someone has an injury, wears a medical device or simply prefers another wrist, comfort should come first.
The purpose is to celebrate the relationship, not to make the ceremony stressful. A relaxed ceremony is easier for children and more enjoyable for everyone.
Step 4: Complete the Tilak
If your family follows this part of the ritual, apply a small tilak to the forehead. Some families use kumkum, sandalwood or another traditional material.
You can then place a few rice grains over the tilak if that is part of your family practice. Keep the amount small and avoid getting loose grains near the eyes.
This is one of the familiar rituals, but it is perfectly fine to keep the ceremony simple if your family does not follow every traditional step.
Step 5: Perform the Aarti If You Wish
Some families include a short aarti before tying the Rakhi. If this is your tradition, use the diya carefully and keep it away from loose clothing, children and decorations.
If your family does not perform an aarti, you can move directly to the Rakhi.
Step 6: Place the Rakhi on the Wrist
Hold the decorative center of the Rakhi on the top side of the wrist. Bring the two ends around the wrist from underneath.
Check the position before securing it. The central design should sit comfortably without pressing into the skin.
This is the main part of how to wear a Rakhi. It should look neat, but it does not need to be perfectly centred.
Step 7: Secure the Rakhi
Bring the ends together and fasten the Rakhi according to its design. For a bracelet-style Rakhi, check the fit, and secure the closure without making it too tight.
A good Rakhi should stay in place during normal movement while leaving enough room for comfortable circulation.
Step 8: Check the Fit
After securing the Rakhi, slide one fingertip gently between the Rakhi and the wrist. It should not feel painfully tight or loose enough to slip off easily.
Look for beads, charms or knots that may be pressing against the skin. If something feels uncomfortable, loosen and adjust it.
Step 9: Offer Sweets and the Gift
Once the Rakhi is secure, offer sweets or another favourite treat. The sibling may then give a gift, envelope,card or thoughtful surprise in return.
Step 10: Take a Family Moment
Finish the ceremony with a smile, hug, photograph or short conversation. Ask children what they enjoyed. Share a funny childhood memory. If siblings live far apart, make a video call after Rakhi arrives.
How to Tie Rakhifor Kids?
Children can easily learn how to tie Rakhifor kids when an adult demonstrates each action slowly. Let the child hold the Rakhi first and identify its centre. Then show them how to place it on the wrist and bring the ends together.
Avoid designs with pointed decorations or very heavy charms. An adjustable Rakhi can also make the process easier for small hands.
Parents can prepare the thali and handle the diya while the child focuses on the Rakhi. If the knot is difficult, the child can position the Rakhi while an adult makes the final knot.
Different Types of Rakhis to Consider
Not every Rakhi is tied exactly the same way. Choosing the right style can make the ceremony easier.
Traditional Thread Rakhi
A traditional thread Rakhi usually has a decorative centre with strings on both sides. It is lightweight and works well for a classic ceremony. The ends are generally secured with a knot.
Bracelet Rakhi
A bracelet Rakhi is designed to look and feel more like everyday wristwear. It may have a clasp, adjustable cord or woven closure. Follow the fastening method supplied with the design.
Personalized Rakhi
A personalized Rakhi can have a name, a photo, initials, or even a special motif. It feels a bit more like it’s part of that same, shared memory, you know. Like it’s not just “a Rakhi” but it connects to something real.
Kids Rakhi
Kids Rakhis usually come with colorful designs, playful characters, or light decorations. Pick one that’s comfy, not too heavy and easy for a child to handle, because nobody wants it slipping around.
Handmade Rakhi
Handmade Rakhis might be made using thread, wool, beads, fabric, paper , or simple craft decorations. The real charm is in the personal effort behind it.
Common Mistakes to a Avoid
Tying Rakhi is pretty easy, but a couple of small errors can mess up comfort. It’s small stuff, but it shows.
Don’t tie the Rakhi so tightly that it leaves a deep mark. And don’t make it too loose, either, because it can fall off with regular movement. Before tying, check for rough thread, sharp decorations or loose bits that might snag later.
Don’t rush the knot. Keep the centre steady while securing the ends. If a child is helping , avoid hot diyas or sharp scissors anywhere within reach.
Simple Rakhi Celebration Ideas
You can celebrate without some huge, big party thing. Just decorate a small corner with flowers, or maybe family photographs. Get your sibling’s favourite sweets ready.Then make a playlist of songs you both like not only one or two but the ones that actually feel right. Take a few pictures before, and a few after the ceremony.
Kids can create handmade cards , or decorate the Rakhi thali with paper flowers. Siblings can swap small handwritten promises, funny memories, or even tiny reasons they appreciate each other.
If your siblings are living in different cities or countries, send the Rakhi a little early, and then celebrate together on a video call. You can still follow the Raksha Bandhan rituals from afar, with one person guiding the other through each step. Even a short call can make the distance feel smaller.
Make the Rakhi Moment Special With Presto Gifts
Once the Rakhi is tied, a thoughtful gift can add that extra layer of warmth to the whole celebration. Presto brings a bunch of Rakhi gift options that can be personalized for brothers, sisters, or siblings celebrating together.
You can check personalized photo plaques , photo collages, caricature gifts, crystals, and Rakhi gift combos. These choices help a lot when you want a keepsake that stays connected to your relationship, not a generic present that anyone could hand out. Presto’s Rakhi range also comes with options across different budgets, so it’s easier to pick something that fits your day.
For instance, a personalized photo frame can hold onto your favourite sibling memories safely. And a customized caricature can add a playful , a little cheeky kind of flavour to the whole occasion. A Rakhi gift combo can also bundle a few personalized items into one neat sweet presentation. Just pick something that matches your sibling’s personality, their interests, and the little moments you both keep in common.
Conclusion
Learning how to tie Rakhi does not need complicated instructions. Get the Rakhi ready, clean the wrist, do any tilak or aarti your family follows, then place the Rakhi comfortably, secure it properly, and double check the fit. After that, share sweets , swap gifts, and just enjoy the moment together.
If you are tying a Rakhi for the first time, keep in mind that the small details matter less than the feeling behind them. Children can join in with help, adults can keep the ritual simple and families can adapt the traditional Rakhi tying to their own routines.
The best Rakhi celebration is the one that feels real for everyone involved. A secure knot, a thoughtful gift, a shared laugh, and a few minutes together can turn a simple thread into a lasting reminder of sibling love.