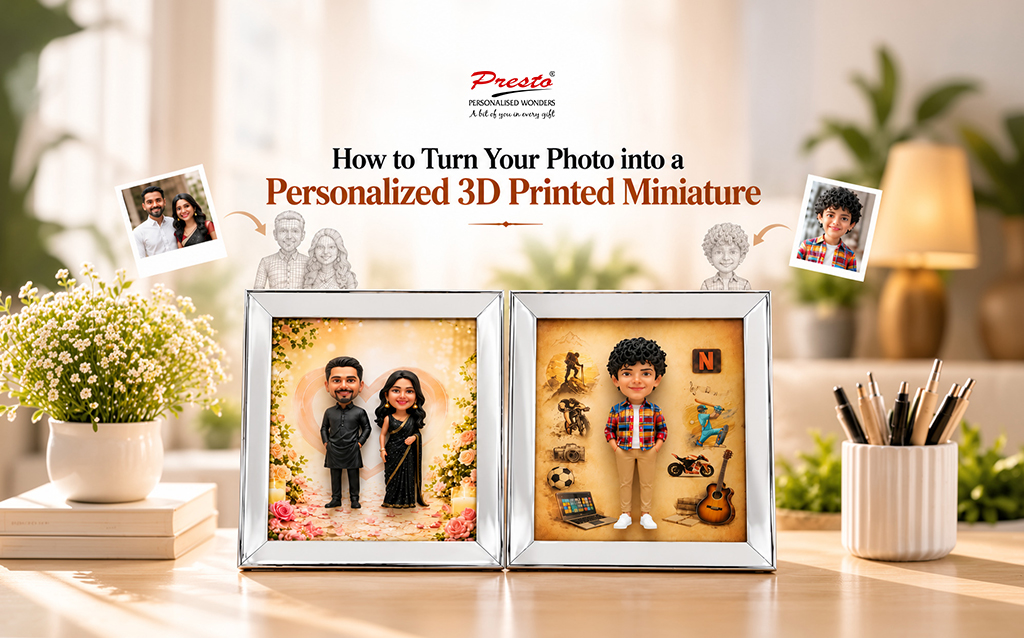
A photo can hold a moment in place. But a three dimensional keepsake can make it feel real. A 3D printed miniature from photo turns a flat image into a small figure you can show on a shelf, hand to someone, or keep for yourself. It can portray a person, a couple, a family member, a pet, or an event you still care about. It moves beyond a normal print.
Digital 3D work and modern printing help make that possible. This is not just a straight copy of the photo. It reads what is there, estimates the rest, forms a digital model, and then prints the final piece. If you know how the steps work, you can pick better photos,share what you want more clearly, and place an order that fits what you expected.
What Is a Photo-Based 3D Miniature?
A photo-based miniature is a small three-dimensional representation created using one or more photographs as visual references. Unlike a flat photo, the finished object has physical height, width and depth. Depending on the design, it may show a person’s facial features, hairstyle, clothing, pose, accessories or other recognizable details.
A 3D photo miniature can be realistic, stylized, cartoon-like or designed around a particular theme. The final appearance depends on the reference images, modelling approach, scale, material and level of customization.Some designs focus on facial resemblance, while others emphasize clothing,posture,props or an entire scene.
The first stage is therefore not printing. It is translating visual information from a two-dimensional image into a three-dimensional design.
How Does a Photo Become a 3D Model?
The process begins when the customer provides photographs and explains what they want the finished miniature to look like. A designer studies the visible features in the images and identifies details that need to be represented in three dimensions.
A single photograph provides strong information about the front-facing appearance but cannot show every side of a person or object. The modeller therefore uses professional judgement to construct areas that are hidden from view.When several photographs are available,they can provide additional references for facial proportions,hairstyle,clothing,body,shape and other details.
The designer then creates a digital 3D mesh. This model contains the surfaces that will eventually become the physical miniature. Facial structure, hair, clothing, hands, footwear and accessories can be shaped within the software. Depending on the project, the design may begin from a digital base model and be customized, or it may be sculpted more extensively from the references.
After modelling, the file is checked for printable geometry. Thin elements may need strengthening,separate components may need adjustment,and the overall design may be scaled to the requested size.The final digital file is then prepared in 3D printing.
Choosing the Right Photos
Good reference pictures matter a lot for the final outcome. Pick photos that are easy to see,with bright,even light.Try not to cover the face or key parts.A clear image helps the artist study the face.Details like the head shape,hair,clothing, and the overall look are easier to judge.
If you are building a small model of one person,choose a photo taken straight on. A view that is slightly to the side is also fine.Side shots,or a three-quarter angle, can show the nose and the jaw better. They also help with the hair and the shape of the head. If the figure has to match an outfit and a pose,pick full-body photos.
Do not use pictures where the face is covered.Sunglasses,a mask,hands in the way,hair over the eyes,or heavy shadows can hide key features.Avoid very blurry or low-quality images too.They make it tough to copy small marks and fine texture.If you already have a specific outfit,item,or pose,include a photo that shows it well.
For two people or a group,use one separate photo for each person.Then add one more photo that shows how you want everyone placed.This gives the designer more information than relying on one crowded photograph.
From Reference to Custom Design
This is where a generic figure becomes a custom 3D miniature from photo.You can usually communicate preferences about pose,clothing,hairstyle,accessories, expression,base design,proportions and overall style.
Some customers want an accurate representation of a person.Others prefer a playful interpretation.For example, a formal photograph can inspire a miniature in wedding attire,while a hobby photograph can be adapted to include sports equipment,musical instruments,work-related objects or other meaningful props.
Customization may also include adding names,dates,messages,logos,themed backgrounds or decorative elements. However, every extra feature needs to be considered in relation to the miniature’s size.Tiny text and very narrow accessories may lose clarity after printing.
The designer may also adjust the pose to improve stability.A dramatic pose can look attractive digitally but may require a stronger connection to the base when produced physically.This is one reason the design stage matters as much as the printing stage.
FactorsThat Affect the Final Miniature
Several factors influence how closely a personalized 3D printed figurine matches its photographic reference. The first is image quality.Clearer photographs provide more reliable visual information.
The second is the number and variety of references.Multiple angles reduce guesswork and can improve the representation of features that are not visible in a single image.
Scale is another important consideration.A larger miniature generally provides more room for facial features,clothing details and accessories.A smaller figure may require details to be simplified so they remain strong enough to print.
The printing material and technology also affect the appearance.Resin printing can support fine details and smooth surfaces,while other printing methods may be selected for durability,size or production requirements.The chosen finish can change how colours, textures and small features are perceived.
Pose and complexity matter too. A standing figure with simple clothing is usually easier to produce than a design containing several people,flowing garments,thin objects or intricate props.The final result is therefore a combination of photographic references,digital interpretation, physical scale and production technique.
The 3D Printing Stage
After the model is approved and prepared,it moves into production.The digital design is converted into instructions that the printer can understand. The model is positioned carefully to balance detail, strength, support requirements and printing efficiency.
During printing,the miniature is built layer by layer.Depending on the chosen technology,the process may use resin,plastic or another suitable material.Complex areas can require temporary supports to hold delicate sections in place during production.
Once printing is complete,the raw figure is removed from the printer and inspected.Supports are carefully detached, and visible marks may be cleaned or refined.This stage is important because the object coming directly from the printer is not necessarily the finished product.
Finishing and Painting
Finishing gives the miniature its final appearance.The printed surface may be cleaned, cured, sanded or otherwise prepared depending on the material and manufacturing method.Small imperfections can be corrected before painting.
For coloured figures,painters or finishing specialists apply the selected colours and details.Skin tones, hair,clothing,shoes,accessories and props can be painted according to the reference images and agreed design.
A personalized 3D figurine from photo may therefore involve several skilled stages rather than one automated action.Digital modelling creates the shape, printing creates the physical form, and finishing adds visual character.
Quality Checks Before Delivery
Before a finished miniature is packed,it should be inspected for structural and visual quality.The maker can check whether the figure stands correctly,whether important components are securely attached,and whether the painted details match the approved design.
Packaging also matters because small protruding elements can be vulnerable during transportation.Suitable protective materials help reduce the risk of damage during delivery.
How to Order Your Personalized Miniature?
Start by deciding who or what you want the miniature to represent.Then collect the clearest photographs available.
Next,decide on the approximate size,pose, clothing,accessories,style and base. If the miniature is intended as a gift,consider the recipient’s personality and the memory you want the design to represent.
Submit the photographs and customization instructions to the provider. Ask about available sizes,materials, finishing options, production timelines, shipping and revision policies. Review the digital preview carefully before production.
For a special occasion,allow enough time for modelling, approval, printing, finishing and delivery.
Tips for Better Customization
Before submitting your order,write down the details you consider essential. Mention the hairstyle,clothing colour,expression,accessories and any feature that should remain prominent.If a particular memory inspired the gift,explain its context.This helps the designer understand which elements deserve attention and which details can be simplified affecting the character.
Why Choose a 3D Printed Miniature as a Gift?
A custom small statue made from a photo can hold a memory in a way that feels close and lasts.It can mark a wedding,birthday,anniversary,graduation,a friendship,a family event,retirement,or any other special day.
It is not just a normal decoration.The look can match a real person or a specific moment. A couple can be shown in their wedding clothes. A parent can get a small statue with a scene that matters to the family. A friend can be recreated with a favorite hobby or a go to item they always use.
A custom 3D printed figurine can also sit on a desk, a shelf, a bedside table, or with other keepsakes.If it is planned well, it blends personal meaning with solid making.
From Photo to Keepsake
Making a photo into a small 3D figure is not just a matter of uploading and hitting print.A picture gives you the look to copy.The modeller shapes it into depth and form.The printer builds the object layer by layer.Then finishing work smooths and refines the result so it looks ready to show.
Good results start with what you expect and what you prepare.Use sharp photos. Follow the setup steps in a clear way.Pick a scale that fits the goal.Add small custom choices that match what you want.The familiar image can turn into something solid you can hold, and set out for others to see.
A photo based miniature can also work as a personal gift.It can capture someone’s face, their style, or a memory you want to keep.With strong photo choices and a simple design plan,a flat picture can become a physical figure made for the person who will receive it.